Building voice applications has become a crucial part in staying competitive in the mobile app market. Developers are proving that there is great potential for brands to further connect with their customers. Integrating display cards into your voice app conversations will allow users to have a more interactive and engaging user experience.
In the previous tutorial, we covered how to create a simple Google Assistant application with one intent with a static response, and deployed it on a test device. In this tutorial, we will be focusing on the visual aspect of our application by learning about Fulfillment. Fulfillment is what allows us to program our responses for our conversations. Google describes Fulfillment as something that “defines the conversational interface for your app and the logic to fulfill the action.”
We will be building a rich display card to showcase an image on our ‘Welcome Intent’. This tutorial will serve as an introduction to building a Fulfillment, and help guide developers in creating a more complex Fulfillment in the following blog series.
Before we begin creating our Fulfillment, we need to first set up our environment.
1. Navigate to the “Fulfillment” tab on the left menu bar. We will see that we are greeted with two options. We can select between using a Webhook, or using an Inline Editor for our Fulfillment. To use one of these options, click on the switch icon to enable the desired option.
a. An Inline Editor is a built-in editor in Dialogflow that you can use to program your Fulfillment. This is very useful for small Node.js applications that don’t require additional files. The Inline Editor is preferred for smaller applications since the Fulfillment is easier to deploy. Moreover, your code in the Inline Editor is synced with your Google Account, so it is convenient to access your code across multiple devices. The downside of working with the Inline Editor is that it cannot support additional modules for the project.
b. Using a Webhook to set up our Fulfillment is a little more advanced compared to using the Inline Editor. However, the Webhook allows support for multiple files in addition to “index.js” and “package.json”(Node.js application files). Since the goal of our blog series is to create an Appointment Scheduler with ClearbridgeMobile, our program will need to support multiple files to handle the files from Google Calendar API. So for the purposes of our tutorial, we will be using the Webhook set up with our own Firebase Server. To set up your Firebase server and webhook, refer to this video tutorial by Google or refer to this article.
2. Now that you have finished setting up by enabling one of the options in the Fulfillment section, it’s time to write code! We will first learn to write our function for our intent, then learn to connect our function with our intent setting an Action name, then create a card with an image. Note that the code provided for you below will be the same whether you are using a Webhook or an Inline Editor because we will only be programming the “index.js” file.
a. To start, we need to enable webhook and give our intent an action name. Navigate to “Intents” section on the left-hand menu, and give our select “Default Welcome Intent”.
b. Then give your intent an Action Name. An Action Name is used to link your functions with your Intents in your Fulfillment. For our case, our intent has a default action name of “input.welcome” so we will be using that to connect our function.
c. Then, under “Fulfillment” within “Default Welcome Intent”, make sure to check off the “Use Webhook” option.
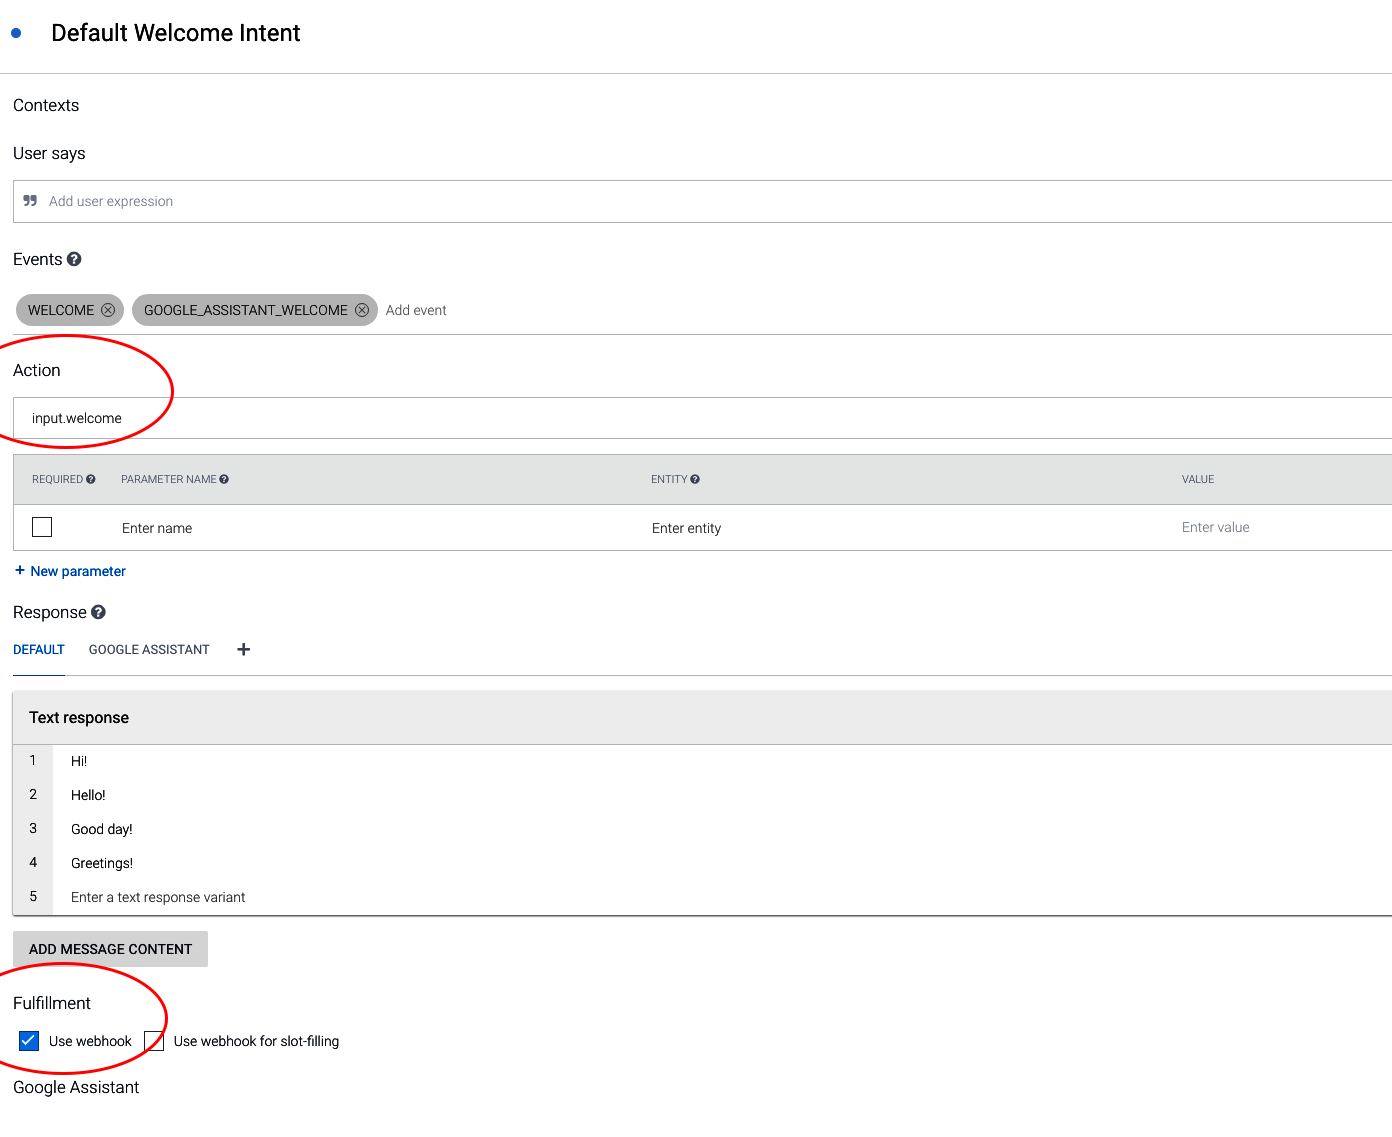
d. Before moving onto the next step, ensure that you have an action name for your intent and that it is enabled to use the webhook as shown on the screenshot.
e. Then, at the top section of our “index.js” file, include the libraries. These libraries are necessary libraries for Dialogflow, so we must implement these in order for our program to work.
[code lang=”js”] const App = require(‘actions-on-google’).DialogflowApp;
const functions = require(‘firebase-functions’);
/**
Note:
Actions-on-google is a library that helps develop Google Assistant applications, and
Firebase-functions is a Cloud Functions for Firebase library
*/
[/code]
f. Then, we will use the function signature provided by Google. We will use the function signature to specify the functions we would like connected to our intents.
[code lang=”js”] exports.dialogflowFirebaseFulfillment = functions.https.onRequest((request, response) => {
// connect functions to our intents here
});
[/code]
g. To connect our functions with our intents, we are using actionMap. An actionMap will map our intents to our function and return a response to Dialogflow using our function. actionMap.set() takes in the Action Name of the Intent, and maps it to a function. In this case, we mapped our Default Welcome Intent to a “welcome” function; hence, we will create a “welcome” function to handle the responses for our intent. Add this to function signature.
[code lang=”js”]
const app = new App({request, response});
let actionMap = new Map();
actionMap.set(‘input.welcome’, welcome);
app.handleRequest(actionMap);
[/code]
Our welcome function will look something like this.
[code lang=”js”]
function welcome(app) {
// response logic will be going in here
}
[/code]
If you wanted to create more functions and connect them to other intents, be sure to give an action name to your intent and connect it to your function using actionMap.set(…).
h. Before creating our display card, let’s first check that our function is connected to our intent. We can do this by writing one of the following in the welcome function.
[code lang=”js”]
// app.tell ends the conversation after consuming the message argument, which will be read out loud to the user.
app.tell(…);
// app.ask will continue listening for further commands after the message argument has been read.
app.ask(…);
[/code]
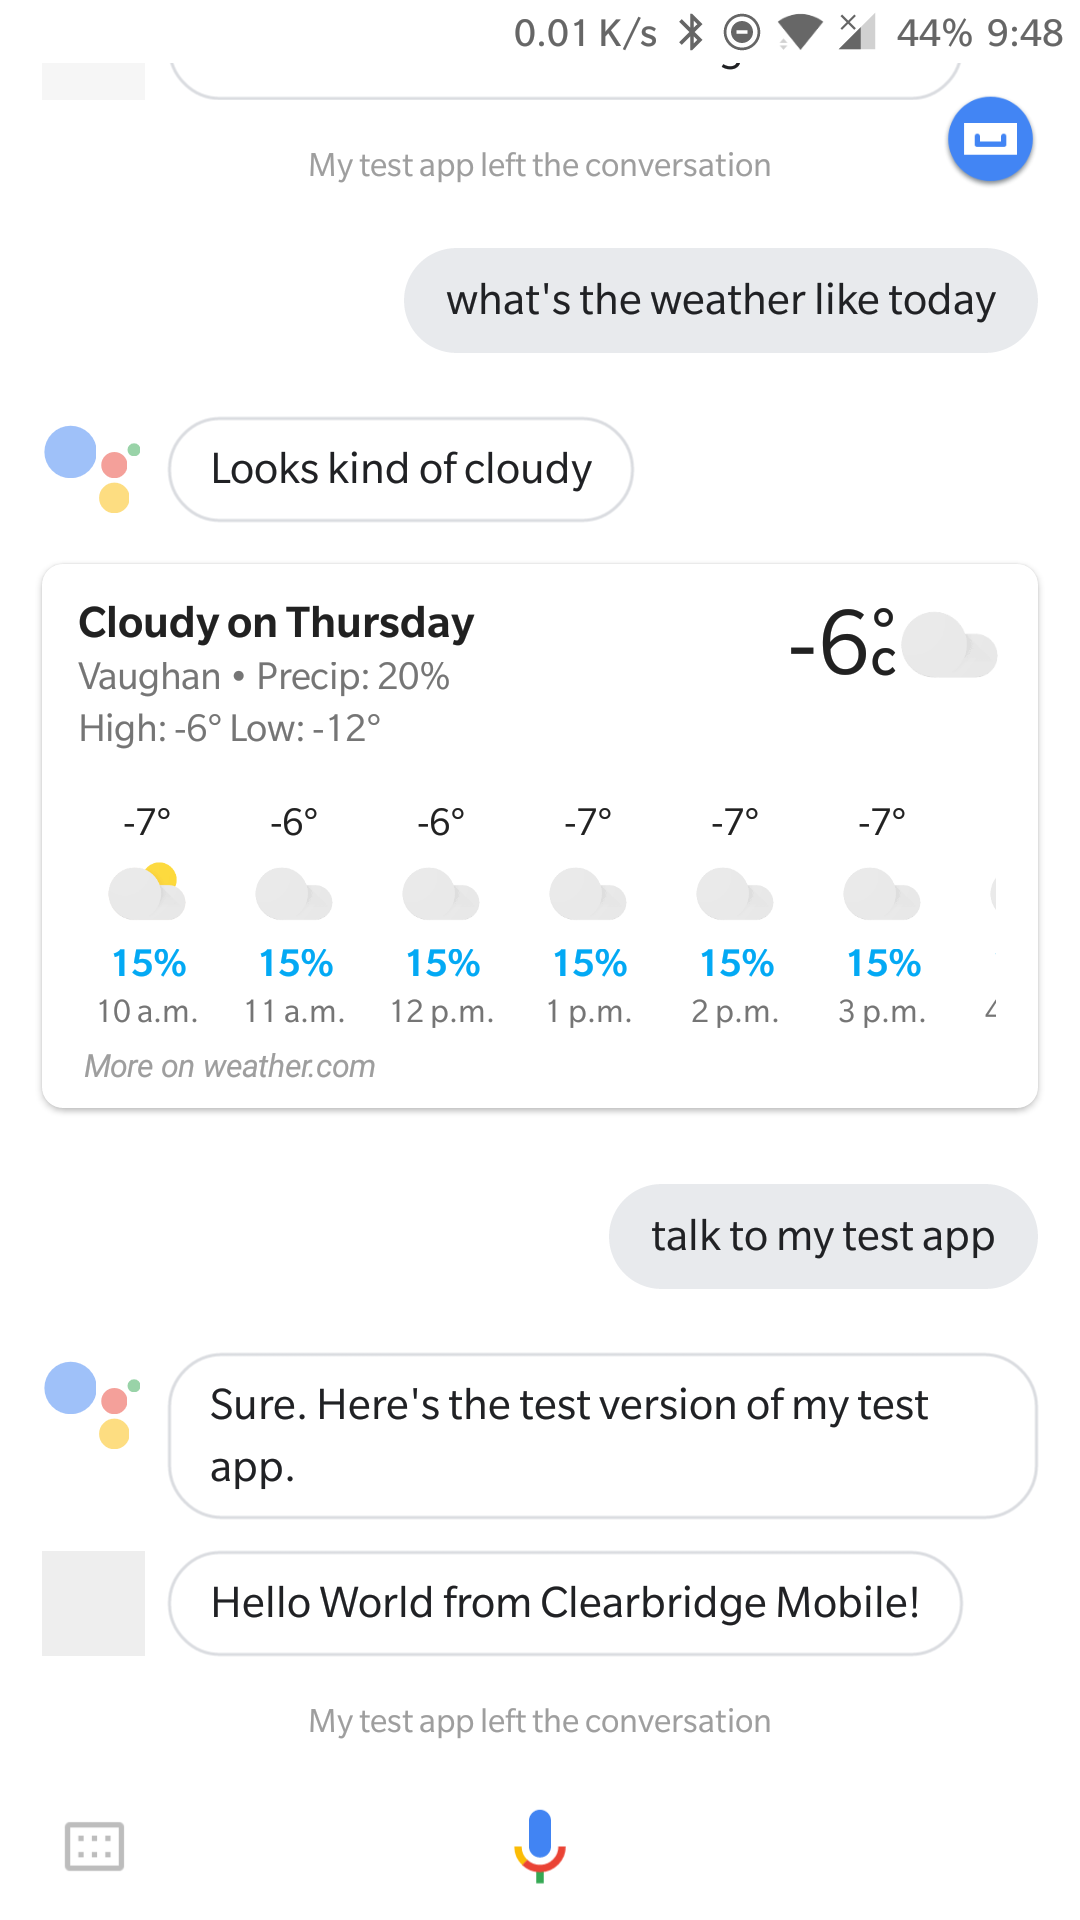
Here is the code I used to test to see if my welcome function was connected with my intent.
[code lang=”js”]
function welcome(app) {
app.tell(“Hello World from Clearbridge Mobile!”);
}
[/code]
i. After saving the changes I made, I tested my app on my testing device, and we can see that our intent is connected to our function.
j. Now that we know that our function is connected, we will now continue creating a card. The response logic of our card looks something like this.
[code lang=”js”]
function welcome(app) {
app.ask(app.buildRichResponse()
.addSimpleResponse(‘Welcome to Clearbridge Appointments. How can I help you today?’)
.addBasicCard(app.buildBasicCard(‘Ask me to create an appointment!’)
.setTitle(‘Clearbridge Appointments’)
.setImage(‘https://clearbridgemobile.com/wp-content/uploads/2017/05/clearbridge-logo-e1497156318168.png’, ‘Clearbridge Mobile Logo’)
.setImageDisplay(‘WHITE’)));
}
[/code]
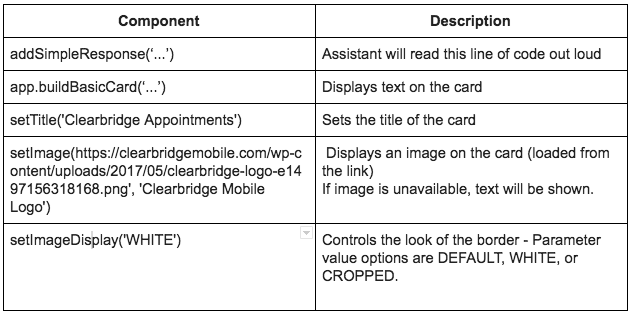
k. To better understand the components of the card, I created a chart that breaks down what each function does. I hope this chart helps you to better understand and customize your program. If you would like to learn more about the components, feel free to check out Google’s guides to making cards over here.
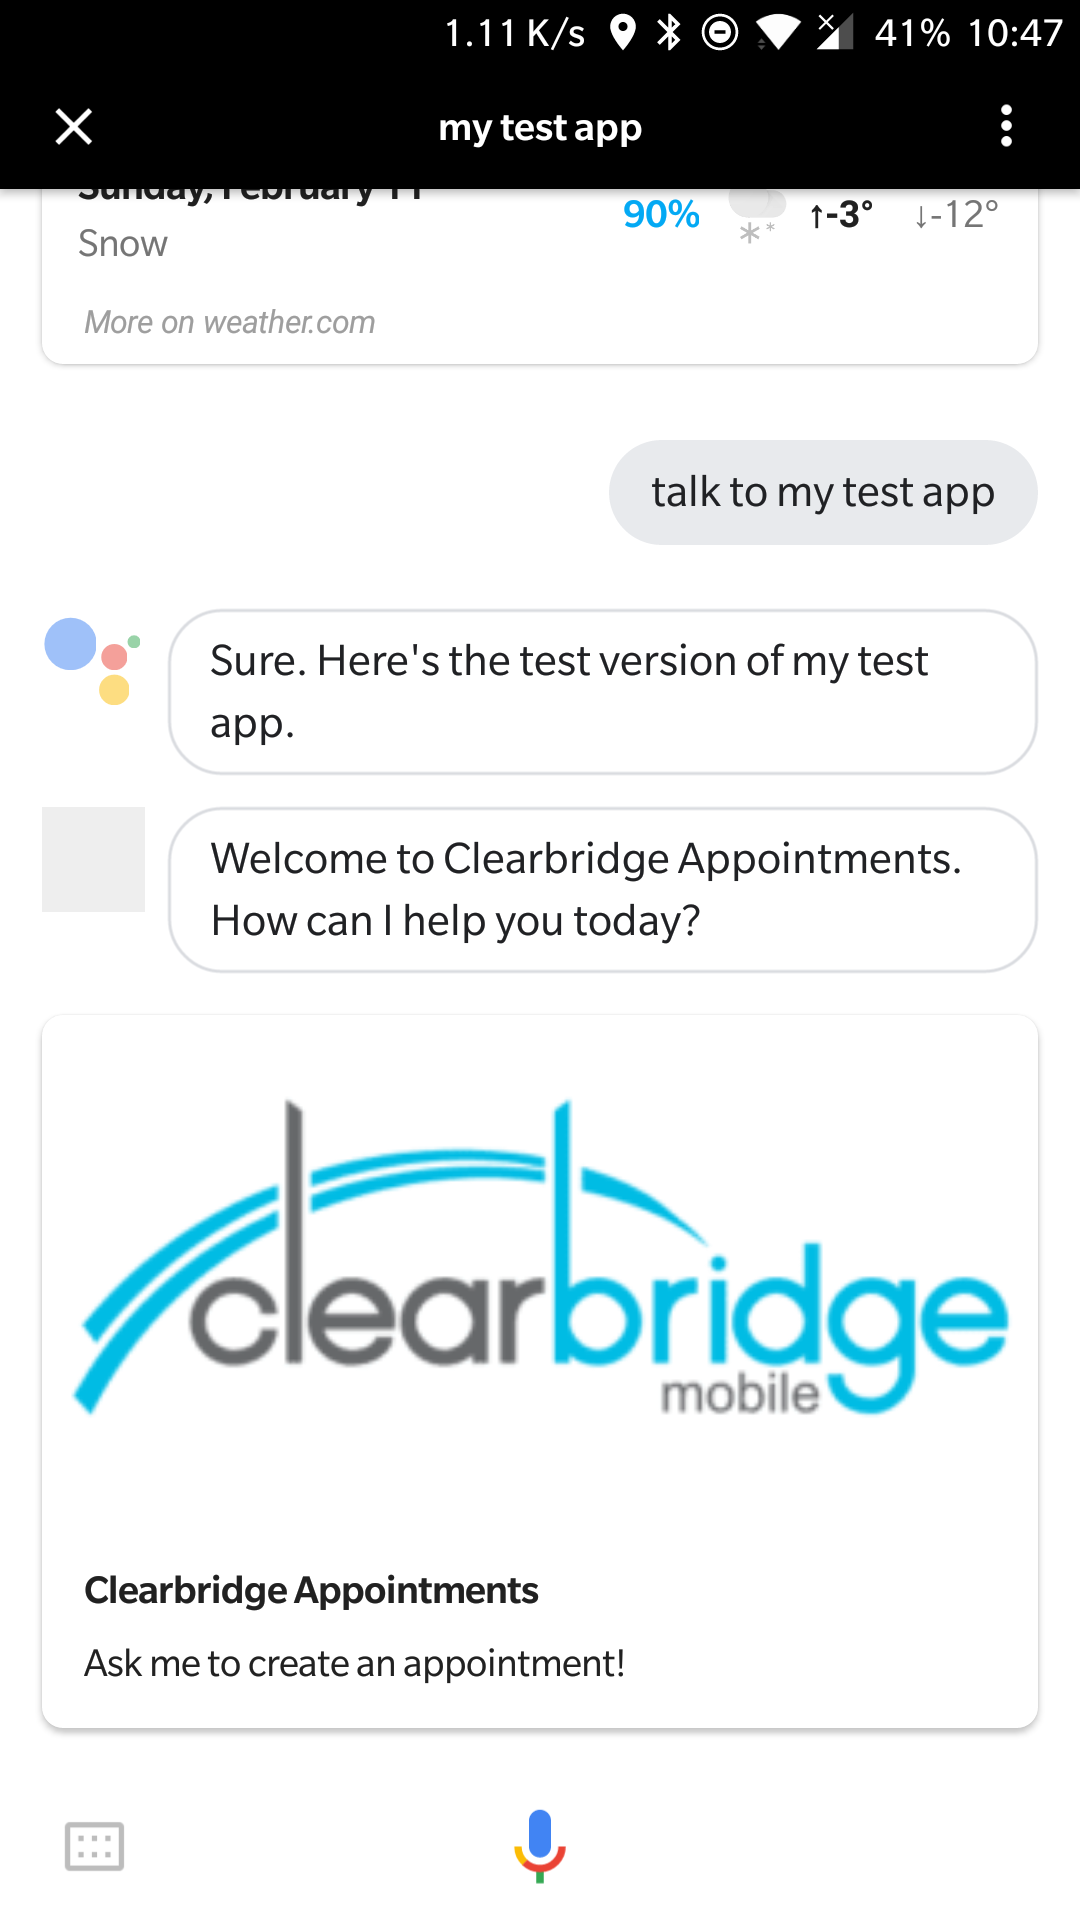
And there you have it! We’ve built our first rich display. Additionally, you’ve learned to connect your intents with your functions in your Fulfillment! If you are interested in learning more about other rich responses such as Lists and Carousels, feel free to check out this page by Google.