User input is crucial in creating an interactive conversation between the user and Dialogflow. It allows programs to generate custom responses for the users, and execute specialized actions for them. Previously, in our first blog, we touched on the idea of Entities; also known as slot-filling variables. In this tutorial, we will learn how to incorporate user input in our conversations within our app. In later tutorials, we will be using our date inputs (provided by the user) so that we can continue building an app that books appointments. Since we have not yet set up our Google Calendar API to book appointments, this tutorial will have Google Assistant return a response that the user inputs instead.
1. To begin, we will start by creating a new Intent to get a date from the user. Since we will be using this Intent in later tutorials to book appointments, we will name our Intent “BookAppointment”, and set our action name as “book.appointment”. Additionally, we will provide expressions for our app to trigger our Intent. I provided expressions such as “make an appointment” and “book an appointment”. You can see more details of my expressions and my configurations in the screenshot below. If you are unsure about creating Intents in Dialogflow, I suggest you read this blog.

2. Next, we will be configuring our slot-filling variable, also known as Entity, within our Intent. Under “Action”, check the “Required” box. This means that our Intent requires this slot-filling input from the user to carry out our business logic/response. Next we have to specify which Entity is required for the function to generate a response. In a situation where you want a custom Entity, you can create it under the “Entities” section on the left-hand menu. However, in our case, we will be using a built-in Entity provided by Dialogflow. We will be using “@sys.date” Entity which allows us to handle date inputs from the user. For clarity, we will also name this Entity provided by Dialogflow as “date”. For more built-in Entities, check this website by Dialogflow. Additionally, you can set another required field called eventName so that the user can input a name for the event.
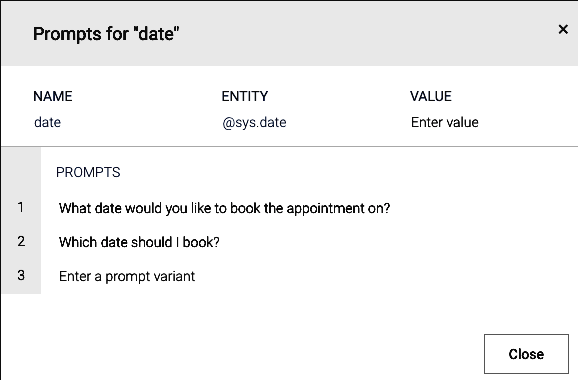
3. After setting up the Entity as a required field and giving it a name, we need to define a prompt for Dialogflow. A prompt is activated when the user hasn’t provided the required slot-filling variable/Entity in the Intent. In our case, we would like to prompt the user to specify a date. To set up the prompt, click on “Define prompts…”. Then, define the prompts below. I’ve specified my prompt to ask “What date would you like the appointment on?” or “Which date should I book?”. Refer to the screenshot above to see how I’ve set up my prompt. Make sure you click “Close” and “Save” after creating your prompts. If you want to specialize your application even more by giving it some character, feel free to provide more responses when you make your prompts.
4. Now that we’ve set up our Intent to require an Entity, it’s time to set up our Fulfillment so that we can incorporate user input to our business logic. In this tutorial, our business logic is to return the user input verbally back to the user. Later, we will change the business logic to book an appointment using the Google Calendar API.
Start by navigating to “Fulfillment” on the left-hand side of the menu. We will now be adding more code to our Fulfillment. If you are new to making a Fulfillment, check out our previous blog to make a Fulfillment. To begin, we will first connect our bookAppointment Intent with our code. Here, I wrote a function called bookAppointment, and connected my function with action.Map() in Google’s function signature:
[code lang=”js”]// Google’s function signature
exports.dialogflowFirebaseFulfillment = functions.https.onRequest((request, response)
=> {
const app = new App({request, response});
let actionMap = new Map();
actionMap.set(‘book.appointment’, bookAppointment);
app.handleRequest(actionMap);
});
[/code]
[code lang=”js”]// function that handles bookAppointment Intent
function bookAppointment(app) {
// we will handle user input here
}
[/code]
5. Now that we connected our function with our Intent, we will learn to handle our user input. The following code demonstrates how we can store user input/slot-filling Entity in our function:
[code lang=”js”]// This function will store the user input in the variable “x”, which we can use in our function
function functionName(app) {
let x = app.getArgument(entityName);
}
[/code]
6. In our application, we want to repeat the input back to the user. I’ve specified mine in the code block below:
[code lang=”js”]function bookAppointment(app) {
let date = app.getArgument(‘date’);
app.ask("Your appointment for " + date + " has been created.");
}
[/code]
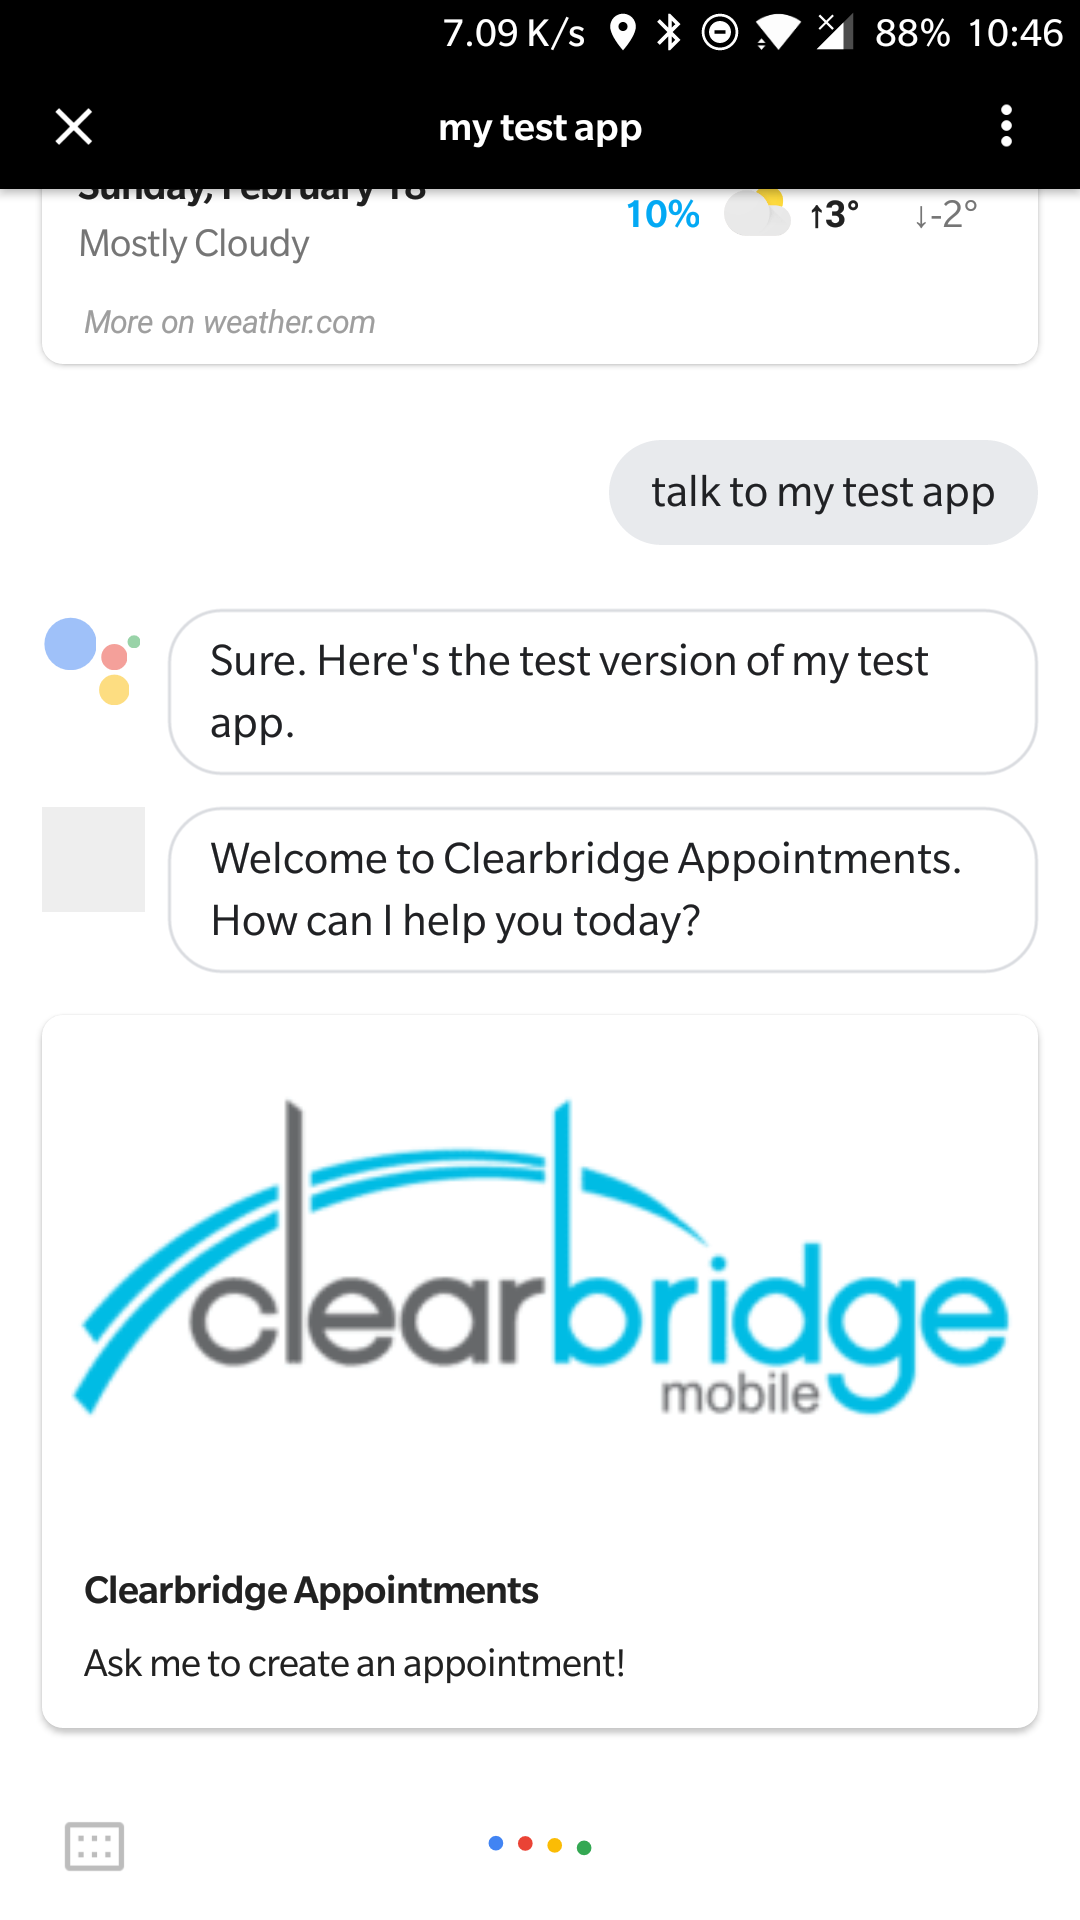
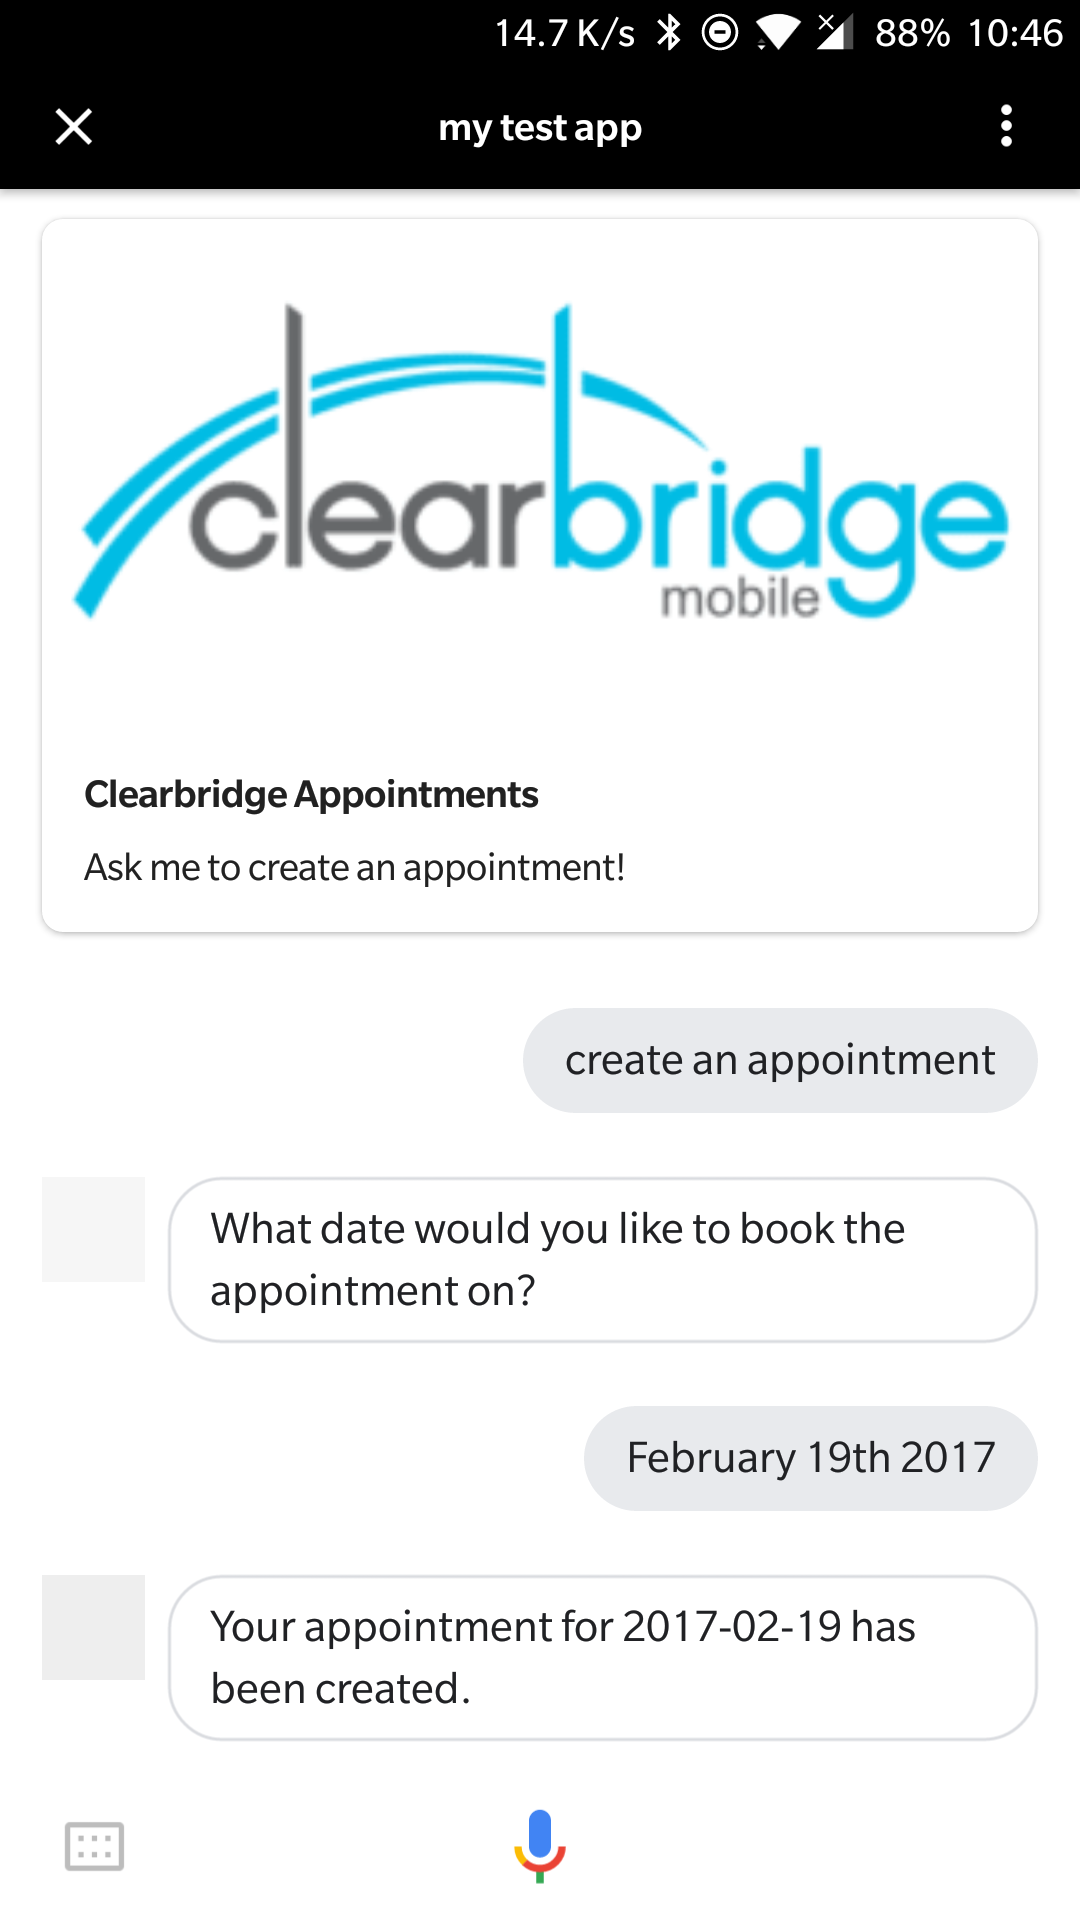
7. After adding all of the code into our app, we can test our application on our devices!
Here is the result:
8. Now that you’ve learned how to handle user input using Entities, you can further develop deeper conversations with Google Assistant and customize your responses.