Being able to display images in a slide show is a very common feature in apps. There is a good chance that you will at some time – if you haven’t already – need to implement this feature, but perhaps you haven’t found any good examples of how this is done using the Cascades framework.
The Blackberry 10 website contains many useful examples on how to use all the components we need to get such a slide show feature working, but it can still be a little overwhelming to get a component such as a ListView working the way you intend it to when you are rather unfamiliar with the SDK (as most people are at this point!). Luckily, we got some assistance from RIM by way of a mostly complete example that is not displayed on the BB10 website.
The example we will examine can achieve this feature using a ListView in QML.
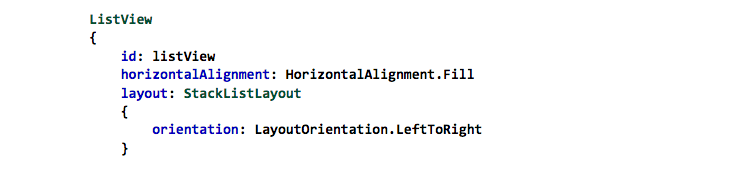
We start by specifying that we wish to use a ListView in a horizontal orientation. This would give us the standard look and feel we are all so familiar with from other platforms. Notice how we specify the way the ListView will be filled. Using the StackListLayout and specifying the orientation to be LeftToRight, we are specifying that we want the list to be populated from left to right, with each successive image added to the right of the last.
Now we need something to fill our ListView with, and we will suppose that this data is stored in an XML file the contents of which resemble this example:
<root>
<item title=“0” imageSource=“images/lam1.png” description=“Item 0”/>
<item title=“1” imageSource=“images/lam2.png” description=“Item 1”/>
.
.
.
</root>
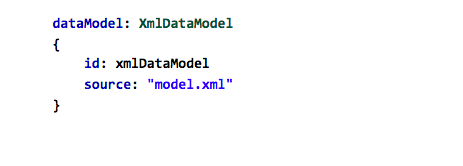
Returning to our QML, we would like a way to take that XML data and fill our ListView with it. It just so happens that Cascades offers the convenience of reading data straight from an XML file by way of the XmlDataModel. There are different types of data model but this one can be quickly created without having to write any C++ code, which makes it perfect for our example.
As is mentioned on the Cascades documentation on ListViews, they follow the MVC architecture. We can see the ListView as the Controller, the dataModel as – of course – the Model. Finally, we are about to take a look at the Controller.
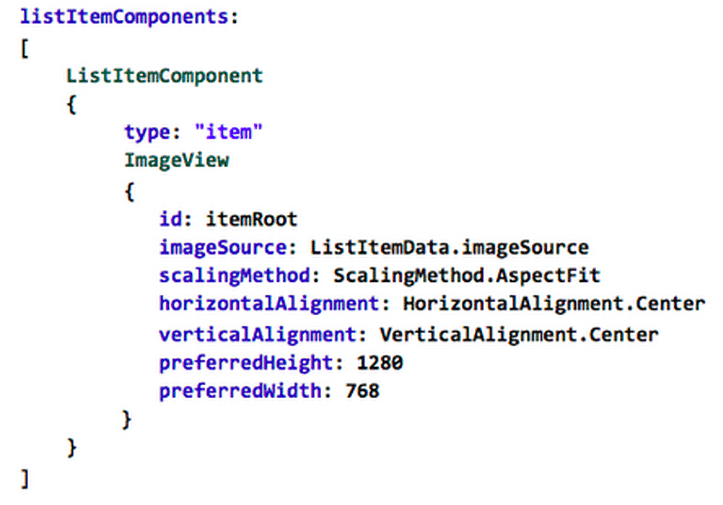
This is where the listItemComponents come in to play. The ListView::listItemComponents is a property that contains any ListItemComponent which consists of any QML component you wish to have in your list items.
In our example, we only have one component of type “item” which is an ImageView. You can read more about the ImageView here. The ImageViews are being populated using the data found in the Model, as we can see from the imageSource being set to the ListItemData’s imageSource, which is the field in the XML (from which we created our dataModel) that contains our asset name. Also the properties that follow help us get the desired layout for each of the images.
Now you have a functioning ListView with images lined up horizontally. Of course, you will quickly notice that it doesn’t quite feel like your standard slide-show quite yet. For one, the individual images do not snap to the center of the screen. This can be remedied though the handling of touch events.
We will want to add some properties that will assist us is handling these touch events. We want to add them in the LIstView, NOT within the listItemComponents.

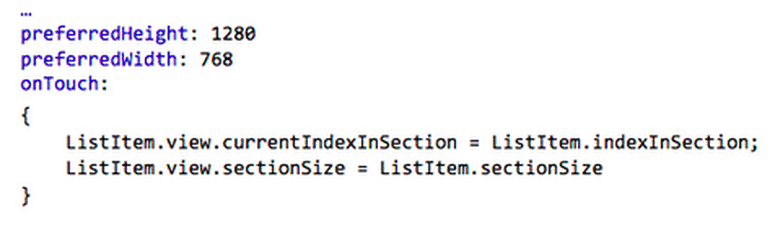
Next we need to handle touch events within the ImageView. The purpose of this is to give us a reference of where in the list we are currently situated when we toucht the screen. Here you will notice we are using ListItem.view. This property is made available by the LIstView since the item visuals were created by way of a ListItemComponent. The power of this ListItem.view is that it gives us access to the ListView in which this item is visible. So, we have access to the properties we have just added in the previous step. In this case, from the ListItem, we are fetching its current index in the list as well as the total number of elements in this list, and setting those values to the appropriate properties that were added to the ListView.
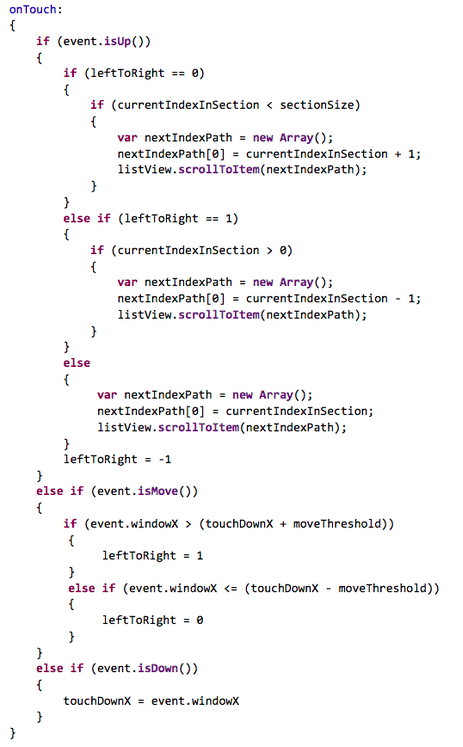
Next we will want to implement the snapping the list to the appropriate element. While Cascades offers a function that handles the actual snapping for us, you need to know what item you should snap to, and this is where our code comes into play. Adding the following bit of code to the end of the ListView will give the desired effect.
Here is an explanation of what is going on in the code below. By comparing where the users first touch was registered in event.onDown, we track the difference between the current position and the first touch in event.isMove and make a determination about the direction in which the user wishes to scroll the list. When the user lifts their finger in event.isUp, depending on the direction of the scroll which was determined in event.isMove, we select the appropriate “next” image, and call the listView.scrollToItem function which automatically scrolls the list to the desired element.
As you can see, creating a Horizontal ListView to display images is not that difficult. The biggest challenge comes with the user interaction with this list, and making it feel like the standard picture slideshow that we are all used to.